8 Easy Ways to Reconnect LED Strip Lights
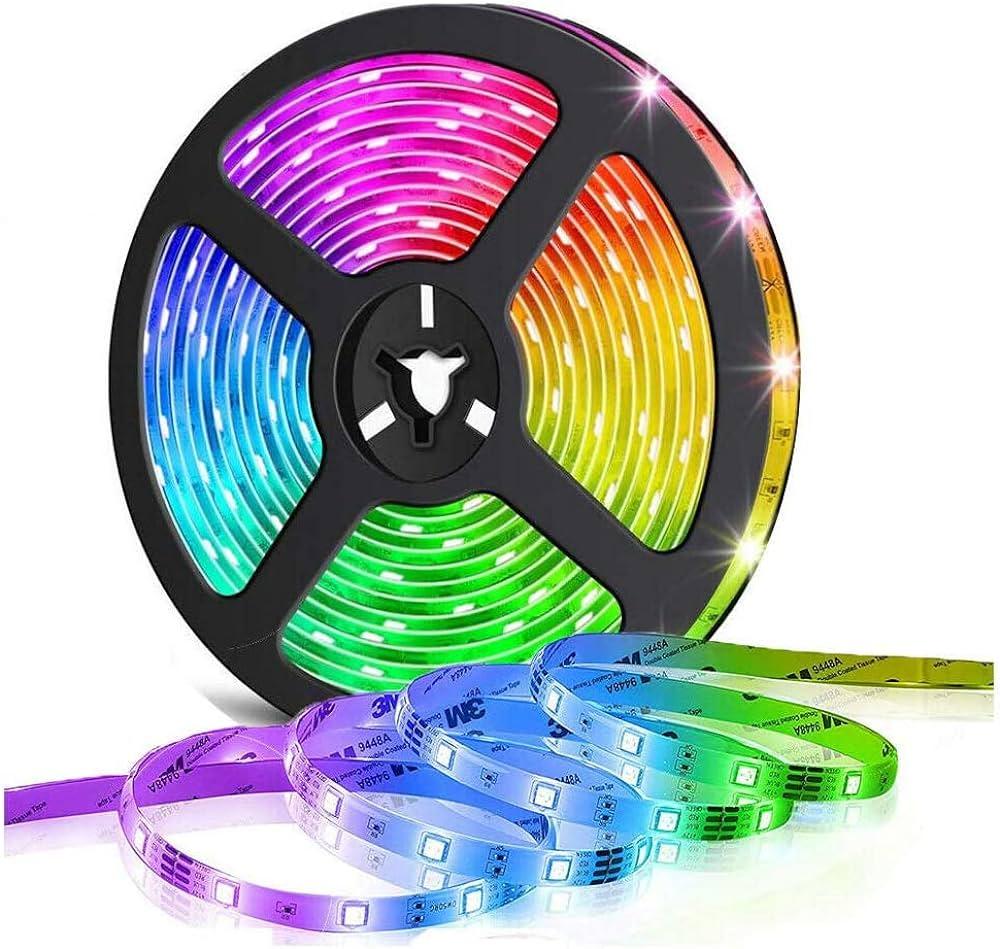
LED strip lights are a popular lighting choice for both residential and commercial spaces. They offer versatility, energy efficiency, and the ability to create stunning visual effects. However, over time, the connections between the LED strips can become loose or damaged, leading to flickering or complete failure of the lights.
Reconnecting LED strip lights may seem daunting, but with the right tools and techniques, it can be done easily. In this article, we will explore eight easy ways to reconnect LED strip lights and ensure they are working optimally.
>>> See More Best led lights in bedroom To Buy At BLLS:
https://www.besport.com/group/1263194
1. Table of Contents
- How to Identify the Type of Connection Used
- Reconnecting Soldered Connectors
- Reconnecting Solderless Connectors
- How to Install and Cut LED Strip Lights
+) Measure and Cut the Strip Light
+) Prepare the Surface
+) Peel off the Adhesive Backing
+) Connect Power Supply
- Fixing and Using Cut LED Strip Lights
+) Cutting LED Light Strips
+) Reconnecting LED Light Strips
+) Tips and Tricks
- Connecting LED Strip Lights with a Strip Connector
+) Using a Quick Connector to Connect LED Strip Lights
+) Choosing the Right Type of Connector
+) Using a Quick Connector
+) Tips for Success
- Soldering Wires to the LED Strip Lights
+) Tools Required for Soldering
+) Understanding LED Strip Lights
+) Before Soldering
+) Soldering Process
+) Low Voltage and Power Supply
- Preparing the Wall for LED Strip Light Installation
+) Clean the Wall Surface
+) Planning Placement
+) Testing Before Installation
+) Installing LED Strip Lights
+) Additional Tips
- Measuring the Length of Wire for LED Strip Light Connection
+) Using a Measuring Tape or Ruler
+) Converting Measurements
+) Adding Extra Length
+) Precision Matters
- Cutting and Installing V or V4 LED Strip Lights Safely
+) Using Sharp Scissors or a Knife
+) Cutting Along Designated Cutting Marks
+) Aligning Positive and Negative Ends Correctly
+) Securing with Adhesive Tape or Clips
+) Following Safety Guidelines
- Attaching the Cap onto the Free End of the LED Strip Lights
+) Using a Plastic End Cap
+) Using a Clip or Plastic Bar
+) Marking Polarity Points
+) Covering with Text Content
+) Avoiding Confusion
2. How to Identify the Type of Connection Used
The first step in reconnecting LED strip lights is to identify the type of connection used. There are two main types: soldered and solderless connectors. Understanding the type of connection will help you choose the appropriate tools and techniques for reconnecting.
3. Reconnecting Soldered Connectors
For soldered connectors, you will need a soldering iron to heat up the existing solder and add new solder if necessary. It is essential to ensure proper alignment and polarity before reconnecting soldered connectors to avoid damaging the LED strip lights or posing a safety hazard.
4. Reconnecting Solderless Connectors
For solderless connectors, such as those with slots or clamps, you can use pliers or wire strippers to remove any damaged wires and reinsert them into their respective positions. Again, make sure to align and connect the wires correctly to ensure proper functionality.
>>> See More Review Battery Powered LED Strip Lights: Sinzau Led Light:
https://www.linkedin.com/feed/update/urn:li:share:7119702029865799680/
5. How to Install and Cut LED Strip Lights
Installing LED strip lights is a fun and creative way to add extra lighting to your home or workspace. Here are the steps to install and cut LED strip lights effectively:
a) Measure and Cut the Strip Light
Before installing the strip lights, measure the length of the area where you want to install them. Use a measuring tape or ruler to measure from one end to another. Mark the length on the strip light using a pencil or marker, and cut along the designated cut lines using sharp scissors or a utility knife.
b) Prepare the Surface
Thoroughly clean the surface where you want to install the LED strip lights using a dry cloth to remove any dust or debris. Ensure that the surface is completely dry before proceeding with installation to ensure proper adhesion.
c) Peel off the Adhesive Backing
Carefully peel off the adhesive backing from the LED strip light and place it onto the prepared surface. Ensure that there are no bubbles trapped under the strip light for even lighting. Press down firmly on all parts of the installed strip lights to ensure proper adhesion and prevent detachment later on.
d) Connect Power Supply
Once the strip lights are installed, connect them to a suitable power supply. Ensure that you match the positive and negative terminals correctly to avoid damaging the lights. Most LED strip lights come with connectors that allow for easy connection to a power supply. Simply plug in the connector into the designated port on the strip light and then connect it to the power supply. Make sure to check the compatibility of the strip lights and power supply before purchasing.
6. Fixing and Using Cut LED Strip Lights
Cutting LED light strips is often necessary to achieve the desired length. Here are some steps to fix and use cut LED strip lights effectively:
a) Cutting LED Light Strips
Locate the designated cut points on the LED light strips, usually marked with a pair of scissors or a dotted line. Use a box cutter or scissors designed for electronics to make the cut precisely along the designated line. Cutting in the wrong place can damage the strip lights beyond repair, so be careful.
b) Reconnecting LED Light Strips
After cutting the LED light strip to size, you may need to reattach wires or connectors to ensure proper functionality. If you’re unsure about how to reconnect them, consult online resources or seek professional guidance. It’s crucial to follow the manufacturer’s guidelines and take precautions when working with electronics to avoid damage.
c) Tips and Tricks
When handling LED light strips during the cutting and reconnection process, handle them with care to avoid bending or twisting excessively, which can cause damage. Use wire strippers instead of scissors for more precise cuts when reattaching wires or connectors. Test your LED light strips before permanent installation to ensure they are working correctly and make any necessary adjustments.
7. Connecting LED Strip Lights with a Strip Connector
Connecting LED strip lights with a strip connector is an easy and efficient way to create longer or more complex lighting setups. Here’s how to do it:
a) Using a Quick Connector to Connect LED Strip Lights
A quick connector is a type of electrical connector that allows you to connect multiple wires quickly and easily without any special tools. Insert the stripped ends of LED strip lights into the appropriate slots on the quick connector. No soldering or crimping is required.
b) Choosing the Right Type of Connector
Before connecting LED strip lights with a quick connector, ensure you choose the right type of connector for your specific needs. Different connectors work with different types of LED strip lights, such as single-color or RGB color-changing strips. Consult the manufacturer’s specifications to make the correct choice.
c) Using a Quick Connector
Align the ends of the LED strip lights properly with the quick connector. Carefully insert each stripped end into the appropriate slots, ensuring good contact with the connector’s prongs. Secure the connection by pressing down on the locking tab or screwing down any clamps to prevent disconnection.
d) Tips for Success
While using a quick connector is easy, keep a few tips in mind. Handle LED strip lights with care to avoid damage. Choose the correct connector type based on the LED strip lights’ specifications. Ensure a secure connection by aligning and inserting the ends properly. Test the lights after connection to ensure they are working correctly.
8. Soldering Wires to the LED Strip Lights
Soldering wires to LED strip lights is necessary for a secure and reliable connection. Follow these steps for successful soldering:
a) Tools Required for Soldering
To solder wires to LED strip lights, you will need a soldering iron, solder, and suitable wires of the proper length and thickness.
b) Understanding LED Strip Lights
LED strip lights consist of flexible circuit boards with attached light-emitting diodes (LEDs). They usually have a black ground wire and a red power wire.
c) Before Soldering
Clean the copper dots on the LED strip lights with alcohol or a suitable cleaning agent to remove any impurities or dirt that can hinder proper soldering.
d) Soldering Process
Heat the soldering iron until it reaches its operating temperature. Gently touch it to one of the copper dots on the LED strip light board. Hold one end of the wire against the melted solder and copper dot simultaneously until they bond firmly. Repeat this process for all connections between the power supply source and LED strips.
e) Low Voltage and Power Supply
Use low voltage to avoid damaging the LED strip lights. Connect them to a power supply with prongs that match the size of the copper dots. Ensure the power supply can provide enough current for all the LEDs while keeping the voltage within a safe range.
9. Preparing the Wall for LED Strip Light Installation
Properly preparing the wall before installing LED strip lights is essential for a successful installation. Follow these steps:
a) Clean the Wall Surface
Thoroughly clean the wall where you plan to install the lights using a damp cloth to remove dirt, dust, or debris that may interfere with the adhesive backing. Ensure the wall is completely dry before proceeding.
b) Planning Placement
Measure the length of the wall and determine the spacing between each light. Use a level to ensure straight and even spacing. This will avoid crooked lines and uneven lighting.
c) Testing Before Installation
Before installing the LED strip lights, test them to ensure they light up correctly. Troubleshoot any issues before proceeding with the installation.
d) Installing LED Strip Lights
Measure and cut the strip lights according to your desired placement. Peel off the adhesive backing and attach the strip lights along the designated path on the wall. Ensure proper adhesion by pressing firmly. Connect the power supply to the end of the strip lights. Test the lights again to ensure they are working correctly.
10. Measuring the Length of Wire for LED Strip Light Connection
Accurate measurement of wire length is crucial when connecting LED strip lights. Follow these steps for precise measurements:
a) Using a Measuring Tape or Ruler
Measure the distance between the power source and the beginning of the LED strip, as well as the distance between each strip if connecting multiple strips. Use a measuring tape or ruler for accurate measurements.
b) Converting Measurements
If necessary, convert measurements from feet or inches to meters, as LED strip light wires are typically measured in meters. Multiply by 0.3048 for feet or 0.0254 for inches.
c) Adding Extra Length
Add a few extra centimeters to each measurement to account for wiring flexibility and adjustments during installation.
d) Precision Matters
Take your time when measuring wire lengths to avoid errors that can cause problems during installation. Double-check your measurements before proceeding.
11. Cutting and Installing V or V4 LED Strip Lights Safely
When cutting and installing V or V4 LED strip lights, safety is paramount. Follow these tips to ensure safe installation:
a) Using Sharp Scissors or a Knife
Use sharp scissors or a knife when cutting V or V4 LED strip lights to avoid damaging the circuit board. Dull tools can compromise functionality.
b) Cutting Along Designated Cutting Marks
Cut along the designated cutting marks on the strip lights to avoid damaging components. Follow the manufacturer’s instructions precisely.
c) Aligning Positive and Negative Ends Correctly
Ensure proper alignment of the positive and negative ends of the strip lights. Incorrect alignment can lead to electrical issues that may cause harm.
d) Securing with Adhesive Tape or Clips
To prevent accidental dislodging of the lights, use adhesive tape or clips to secure them in place. This will maintain their aesthetic appeal and prevent sagging.
e) Following Safety Guidelines
Adhere to safety guidelines when working with electrical components. Turn off power sources before installation and avoid contact with exposed wires. Wear protective gear when handling LED strip lights.
12. Attaching the Cap onto the Free End of the LED Strip Lights
Attaching the cap onto the free end of the LED strip lights is important to protect the terminals and ensure proper polarity. Follow these steps:
a) Using a Plastic End Cap
Slide a plastic end cap onto the free end of the LED strip lights to protect the terminals. Ensure it fits securely.
b) Using a Clip or Plastic Bar
Use a clip or plastic bar to hold the end cap in place securely. This will prevent accidental detachment.
c) Marking Polarity Points
Mark polarity points on the plastic end cap using a marker or paint pen to indicate the correct direction for connecting the LED strip lights.
d) Covering with Text Content
If needed, cover the plastic end cap with text content for clarity. This will help avoid confusion and ensure safe use of the LED strip lights.
e) Avoiding Confusion
By following these steps, you can avoid confusion when connecting LED strip lights. Marking polarity points and using text content can help ensure correct installation.
Conclusion
In conclusion, reconnecting LED strip lights is a manageable task with the right knowledge and tools. Whether it’s soldering, using connectors, or installing and cutting strip lights, following the appropriate steps and safety guidelines is essential for a successful outcome. Remember to measure accurately, adhere to manufacturer instructions, and take precautions to protect yourself and the equipment. With these tips, you’ll be able to reconnect your LED strip lights safely and easily.
FAQs
1. Why would LED strip lights need to be reconnected?
LED strip lights may need to be reconnected due to accidental disconnection, damaged connectors, or when customizing the length to fit a specific space.
2. Can I reconnect LED strip lights without soldering?
Yes, LED strip lights often come with connectors that allow for solder-free connections. These connectors are user-friendly and provide a quick and easy way to reconnect the strips.
3. What tools do I need to reconnect LED strip lights?
Depending on the method you choose, you may need wire cutters, scissors, soldering equipment (if soldering), and additional connectors or wires.
4. Can I use connectors to join two LED strips together?
Yes, connectors are commonly used to join two LED strips together. They come in various types, such as snap connectors, solderless connectors, and quick connectors, providing flexibility in the connection process.
5. How do I reconnect LED strip lights that were cut at the wrong location?
If LED strips were cut at the wrong location, you can use additional wires and connectors to bridge the gap and reconnect the cut sections.
>>> See More CAN WE CUT LED STRIP LIGHTS:
https://www.facebook.com/bestledlightsblls/posts/246048391714159 8 Easy Ways to Reconnect LED Strip Lights
LED strip lights are a popular lighting choice for both residential and commercial spaces. They offer versatility, energy efficiency, and the ability to create stunning visual effects. However, over time, the connections between the LED strips can become loose or damaged, leading to flickering or complete failure of the lights.
Reconnecting LED strip lights may seem daunting, but with the right tools and techniques, it can be done easily. In this article, we will explore eight easy ways to reconnect LED strip lights and ensure they are working optimally.
>>> See More Best led lights in bedroom To Buy At BLLS: https://www.besport.com/group/1263194
1. Table of Contents
- How to Identify the Type of Connection Used
- Reconnecting Soldered Connectors
- Reconnecting Solderless Connectors
- How to Install and Cut LED Strip Lights
+) Measure and Cut the Strip Light
+) Prepare the Surface
+) Peel off the Adhesive Backing
+) Connect Power Supply
- Fixing and Using Cut LED Strip Lights
+) Cutting LED Light Strips
+) Reconnecting LED Light Strips
+) Tips and Tricks
- Connecting LED Strip Lights with a Strip Connector
+) Using a Quick Connector to Connect LED Strip Lights
+) Choosing the Right Type of Connector
+) Using a Quick Connector
+) Tips for Success
- Soldering Wires to the LED Strip Lights
+) Tools Required for Soldering
+) Understanding LED Strip Lights
+) Before Soldering
+) Soldering Process
+) Low Voltage and Power Supply
- Preparing the Wall for LED Strip Light Installation
+) Clean the Wall Surface
+) Planning Placement
+) Testing Before Installation
+) Installing LED Strip Lights
+) Additional Tips
- Measuring the Length of Wire for LED Strip Light Connection
+) Using a Measuring Tape or Ruler
+) Converting Measurements
+) Adding Extra Length
+) Precision Matters
- Cutting and Installing V or V4 LED Strip Lights Safely
+) Using Sharp Scissors or a Knife
+) Cutting Along Designated Cutting Marks
+) Aligning Positive and Negative Ends Correctly
+) Securing with Adhesive Tape or Clips
+) Following Safety Guidelines
- Attaching the Cap onto the Free End of the LED Strip Lights
+) Using a Plastic End Cap
+) Using a Clip or Plastic Bar
+) Marking Polarity Points
+) Covering with Text Content
+) Avoiding Confusion
2. How to Identify the Type of Connection Used
The first step in reconnecting LED strip lights is to identify the type of connection used. There are two main types: soldered and solderless connectors. Understanding the type of connection will help you choose the appropriate tools and techniques for reconnecting.
3. Reconnecting Soldered Connectors
For soldered connectors, you will need a soldering iron to heat up the existing solder and add new solder if necessary. It is essential to ensure proper alignment and polarity before reconnecting soldered connectors to avoid damaging the LED strip lights or posing a safety hazard.
4. Reconnecting Solderless Connectors
For solderless connectors, such as those with slots or clamps, you can use pliers or wire strippers to remove any damaged wires and reinsert them into their respective positions. Again, make sure to align and connect the wires correctly to ensure proper functionality.
>>> See More Review Battery Powered LED Strip Lights: Sinzau Led Light: https://www.linkedin.com/feed/update/urn:li:share:7119702029865799680/
5. How to Install and Cut LED Strip Lights
Installing LED strip lights is a fun and creative way to add extra lighting to your home or workspace. Here are the steps to install and cut LED strip lights effectively:
a) Measure and Cut the Strip Light
Before installing the strip lights, measure the length of the area where you want to install them. Use a measuring tape or ruler to measure from one end to another. Mark the length on the strip light using a pencil or marker, and cut along the designated cut lines using sharp scissors or a utility knife.
b) Prepare the Surface
Thoroughly clean the surface where you want to install the LED strip lights using a dry cloth to remove any dust or debris. Ensure that the surface is completely dry before proceeding with installation to ensure proper adhesion.
c) Peel off the Adhesive Backing
Carefully peel off the adhesive backing from the LED strip light and place it onto the prepared surface. Ensure that there are no bubbles trapped under the strip light for even lighting. Press down firmly on all parts of the installed strip lights to ensure proper adhesion and prevent detachment later on.
d) Connect Power Supply
Once the strip lights are installed, connect them to a suitable power supply. Ensure that you match the positive and negative terminals correctly to avoid damaging the lights. Most LED strip lights come with connectors that allow for easy connection to a power supply. Simply plug in the connector into the designated port on the strip light and then connect it to the power supply. Make sure to check the compatibility of the strip lights and power supply before purchasing.
6. Fixing and Using Cut LED Strip Lights
Cutting LED light strips is often necessary to achieve the desired length. Here are some steps to fix and use cut LED strip lights effectively:
a) Cutting LED Light Strips
Locate the designated cut points on the LED light strips, usually marked with a pair of scissors or a dotted line. Use a box cutter or scissors designed for electronics to make the cut precisely along the designated line. Cutting in the wrong place can damage the strip lights beyond repair, so be careful.
b) Reconnecting LED Light Strips
After cutting the LED light strip to size, you may need to reattach wires or connectors to ensure proper functionality. If you’re unsure about how to reconnect them, consult online resources or seek professional guidance. It’s crucial to follow the manufacturer’s guidelines and take precautions when working with electronics to avoid damage.
c) Tips and Tricks
When handling LED light strips during the cutting and reconnection process, handle them with care to avoid bending or twisting excessively, which can cause damage. Use wire strippers instead of scissors for more precise cuts when reattaching wires or connectors. Test your LED light strips before permanent installation to ensure they are working correctly and make any necessary adjustments.
7. Connecting LED Strip Lights with a Strip Connector
Connecting LED strip lights with a strip connector is an easy and efficient way to create longer or more complex lighting setups. Here’s how to do it:
a) Using a Quick Connector to Connect LED Strip Lights
A quick connector is a type of electrical connector that allows you to connect multiple wires quickly and easily without any special tools. Insert the stripped ends of LED strip lights into the appropriate slots on the quick connector. No soldering or crimping is required.
b) Choosing the Right Type of Connector
Before connecting LED strip lights with a quick connector, ensure you choose the right type of connector for your specific needs. Different connectors work with different types of LED strip lights, such as single-color or RGB color-changing strips. Consult the manufacturer’s specifications to make the correct choice.
c) Using a Quick Connector
Align the ends of the LED strip lights properly with the quick connector. Carefully insert each stripped end into the appropriate slots, ensuring good contact with the connector’s prongs. Secure the connection by pressing down on the locking tab or screwing down any clamps to prevent disconnection.
d) Tips for Success
While using a quick connector is easy, keep a few tips in mind. Handle LED strip lights with care to avoid damage. Choose the correct connector type based on the LED strip lights’ specifications. Ensure a secure connection by aligning and inserting the ends properly. Test the lights after connection to ensure they are working correctly.
8. Soldering Wires to the LED Strip Lights
Soldering wires to LED strip lights is necessary for a secure and reliable connection. Follow these steps for successful soldering:
a) Tools Required for Soldering
To solder wires to LED strip lights, you will need a soldering iron, solder, and suitable wires of the proper length and thickness.
b) Understanding LED Strip Lights
LED strip lights consist of flexible circuit boards with attached light-emitting diodes (LEDs). They usually have a black ground wire and a red power wire.
c) Before Soldering
Clean the copper dots on the LED strip lights with alcohol or a suitable cleaning agent to remove any impurities or dirt that can hinder proper soldering.
d) Soldering Process
Heat the soldering iron until it reaches its operating temperature. Gently touch it to one of the copper dots on the LED strip light board. Hold one end of the wire against the melted solder and copper dot simultaneously until they bond firmly. Repeat this process for all connections between the power supply source and LED strips.
e) Low Voltage and Power Supply
Use low voltage to avoid damaging the LED strip lights. Connect them to a power supply with prongs that match the size of the copper dots. Ensure the power supply can provide enough current for all the LEDs while keeping the voltage within a safe range.
9. Preparing the Wall for LED Strip Light Installation
Properly preparing the wall before installing LED strip lights is essential for a successful installation. Follow these steps:
a) Clean the Wall Surface
Thoroughly clean the wall where you plan to install the lights using a damp cloth to remove dirt, dust, or debris that may interfere with the adhesive backing. Ensure the wall is completely dry before proceeding.
b) Planning Placement
Measure the length of the wall and determine the spacing between each light. Use a level to ensure straight and even spacing. This will avoid crooked lines and uneven lighting.
c) Testing Before Installation
Before installing the LED strip lights, test them to ensure they light up correctly. Troubleshoot any issues before proceeding with the installation.
d) Installing LED Strip Lights
Measure and cut the strip lights according to your desired placement. Peel off the adhesive backing and attach the strip lights along the designated path on the wall. Ensure proper adhesion by pressing firmly. Connect the power supply to the end of the strip lights. Test the lights again to ensure they are working correctly.
10. Measuring the Length of Wire for LED Strip Light Connection
Accurate measurement of wire length is crucial when connecting LED strip lights. Follow these steps for precise measurements:
a) Using a Measuring Tape or Ruler
Measure the distance between the power source and the beginning of the LED strip, as well as the distance between each strip if connecting multiple strips. Use a measuring tape or ruler for accurate measurements.
b) Converting Measurements
If necessary, convert measurements from feet or inches to meters, as LED strip light wires are typically measured in meters. Multiply by 0.3048 for feet or 0.0254 for inches.
c) Adding Extra Length
Add a few extra centimeters to each measurement to account for wiring flexibility and adjustments during installation.
d) Precision Matters
Take your time when measuring wire lengths to avoid errors that can cause problems during installation. Double-check your measurements before proceeding.
11. Cutting and Installing V or V4 LED Strip Lights Safely
When cutting and installing V or V4 LED strip lights, safety is paramount. Follow these tips to ensure safe installation:
a) Using Sharp Scissors or a Knife
Use sharp scissors or a knife when cutting V or V4 LED strip lights to avoid damaging the circuit board. Dull tools can compromise functionality.
b) Cutting Along Designated Cutting Marks
Cut along the designated cutting marks on the strip lights to avoid damaging components. Follow the manufacturer’s instructions precisely.
c) Aligning Positive and Negative Ends Correctly
Ensure proper alignment of the positive and negative ends of the strip lights. Incorrect alignment can lead to electrical issues that may cause harm.
d) Securing with Adhesive Tape or Clips
To prevent accidental dislodging of the lights, use adhesive tape or clips to secure them in place. This will maintain their aesthetic appeal and prevent sagging.
e) Following Safety Guidelines
Adhere to safety guidelines when working with electrical components. Turn off power sources before installation and avoid contact with exposed wires. Wear protective gear when handling LED strip lights.
12. Attaching the Cap onto the Free End of the LED Strip Lights
Attaching the cap onto the free end of the LED strip lights is important to protect the terminals and ensure proper polarity. Follow these steps:
a) Using a Plastic End Cap
Slide a plastic end cap onto the free end of the LED strip lights to protect the terminals. Ensure it fits securely.
b) Using a Clip or Plastic Bar
Use a clip or plastic bar to hold the end cap in place securely. This will prevent accidental detachment.
c) Marking Polarity Points
Mark polarity points on the plastic end cap using a marker or paint pen to indicate the correct direction for connecting the LED strip lights.
d) Covering with Text Content
If needed, cover the plastic end cap with text content for clarity. This will help avoid confusion and ensure safe use of the LED strip lights.
e) Avoiding Confusion
By following these steps, you can avoid confusion when connecting LED strip lights. Marking polarity points and using text content can help ensure correct installation.
Conclusion
In conclusion, reconnecting LED strip lights is a manageable task with the right knowledge and tools. Whether it’s soldering, using connectors, or installing and cutting strip lights, following the appropriate steps and safety guidelines is essential for a successful outcome. Remember to measure accurately, adhere to manufacturer instructions, and take precautions to protect yourself and the equipment. With these tips, you’ll be able to reconnect your LED strip lights safely and easily.
FAQs
1. Why would LED strip lights need to be reconnected?
LED strip lights may need to be reconnected due to accidental disconnection, damaged connectors, or when customizing the length to fit a specific space.
2. Can I reconnect LED strip lights without soldering?
Yes, LED strip lights often come with connectors that allow for solder-free connections. These connectors are user-friendly and provide a quick and easy way to reconnect the strips.
3. What tools do I need to reconnect LED strip lights?
Depending on the method you choose, you may need wire cutters, scissors, soldering equipment (if soldering), and additional connectors or wires.
4. Can I use connectors to join two LED strips together?
Yes, connectors are commonly used to join two LED strips together. They come in various types, such as snap connectors, solderless connectors, and quick connectors, providing flexibility in the connection process.
5. How do I reconnect LED strip lights that were cut at the wrong location?
If LED strips were cut at the wrong location, you can use additional wires and connectors to bridge the gap and reconnect the cut sections.
>>> See More CAN WE CUT LED STRIP LIGHTS: https://www.facebook.com/bestledlightsblls/posts/246048391714159